Are you a DIY’er and want to build a large lithium bank, but not spend top dollar? Using brand new, ‘Class A’ lithium cells, you can build your own lithium bank and have it fully protected.
The setup above will protect the batteries from:
- High Voltage
- Low Voltage
- Low State-of-Charge (SOC)
- High Temperature
- Low Temperature
- Over-Current
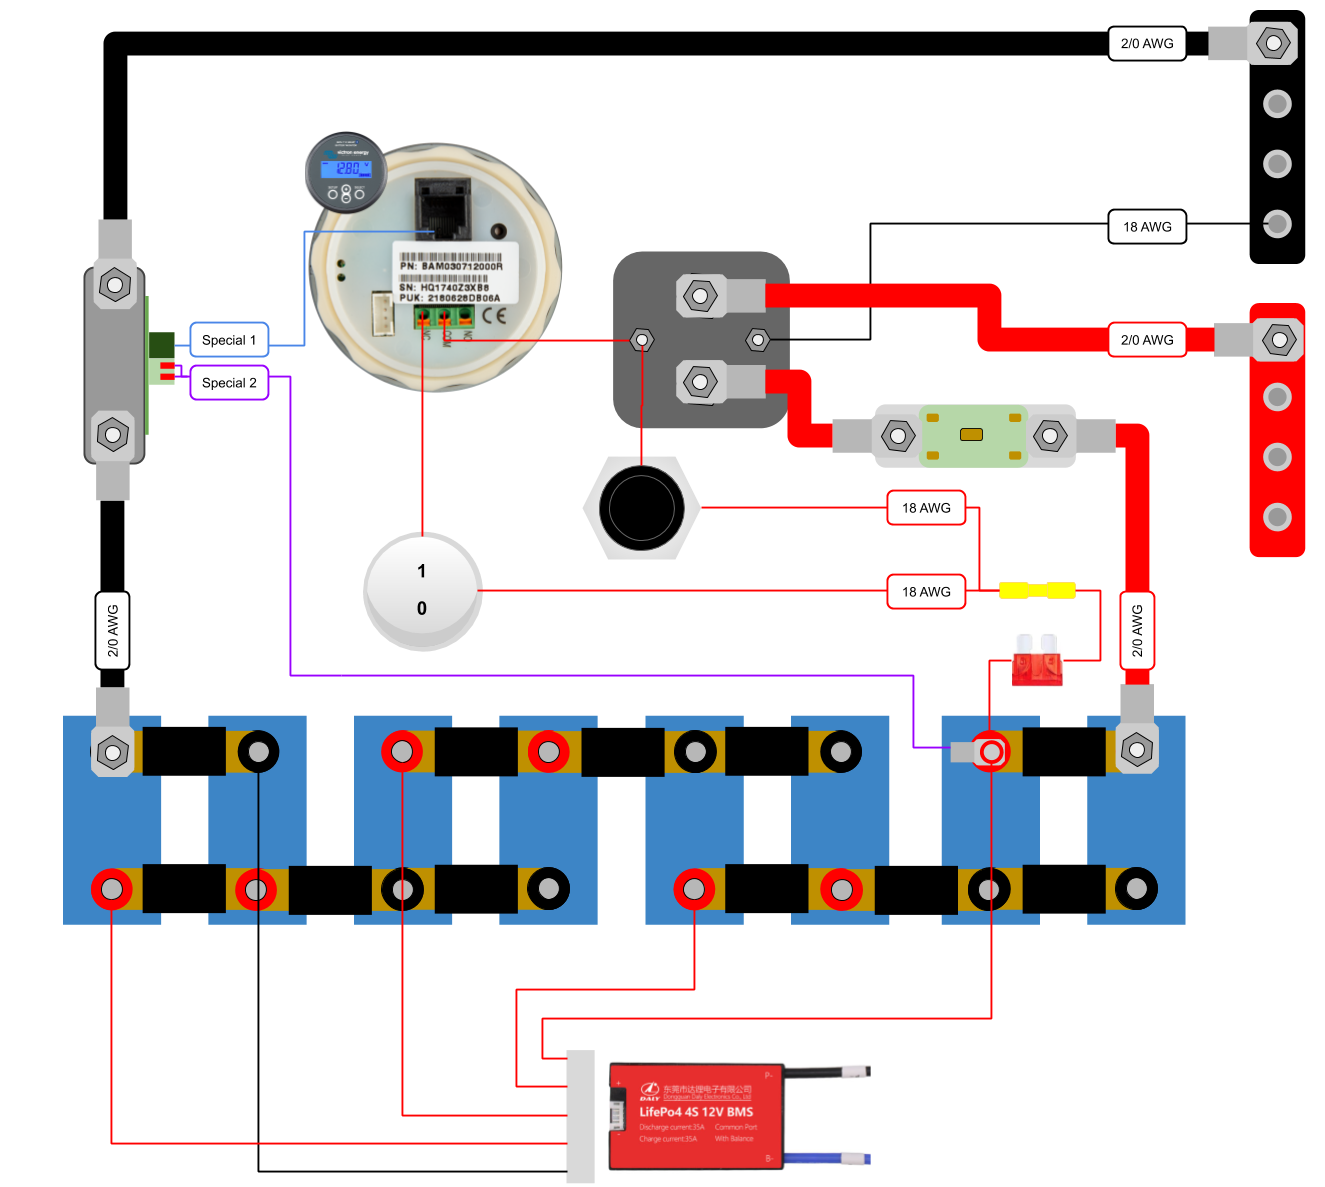
The key to the whole system is the Victron BMV 712 with a temperature-sense cable and a large relay. With those items, you can build out an awesome battery bank for way less than you would buying any commercial brand of battery. Plus, you’ll be able to see your state-of-charge, and you can control the exact limits of your system, as you see fit.
I’ll list out all the components and tools you’ll need to build the system. Anyone can do this, you just need some time and patience.
Before we get started, a few comments. This system, as it is designed here, will cost approximately $xyz for 300 amp-hours of protected lithium battery. It is intended to be used with a 2,000 watt (or less) inverter. By using this relatively sized inverter, you can’t exceed the amperage limits on the batteries. The Victron BMV will then protect against everything else (including low temperature).
FCC notice: Most links below are affiliate links

Lithium Cell
Raw lithium cells have no protections built into them. Just like a lead-acid battery, they simply have positive and negative terminals.
Lithium cells are considered 3.2volts each. Taking four of these in series would yield a 12.8v (or 12v nominal) battery bank.
These can be purchased on AliExpress (or other places online) in various sizes.

Lithium Bank
In this bank, we’re configuration a 2p4s configuration. This means we’re taking two cells, combining them together (positive to positive and negative to negative), four times, then connecting those four pieces together in series.
The first step of connecting in parallel increases the amperage. The second step of connecting in series increases the voltage. This is what lets us use 3.2v batteries in a 12v-nominal system.
When you buy the batteries on AliExpress (or most other places), they generally include BusBars that will conveniently connect the cells together. Make sure when you’re buying batteries that they include those BusBars.
Balancer
Optional
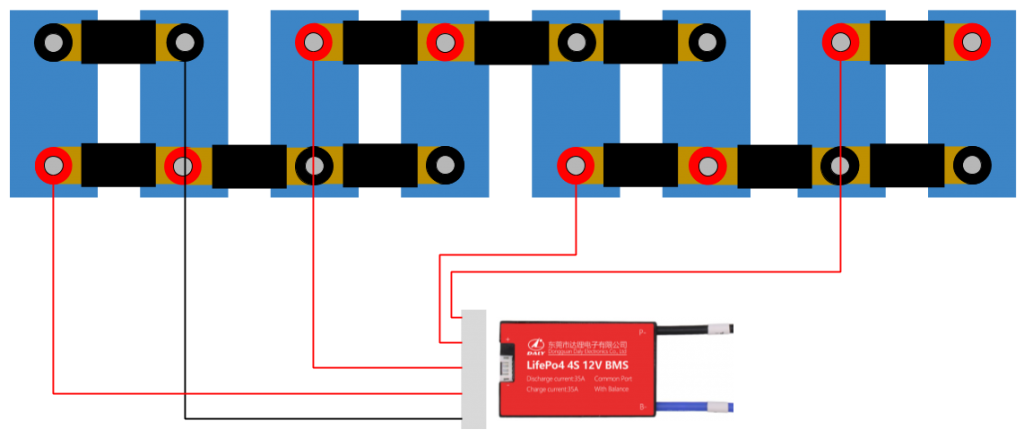
We’re using a cheap BMS here to serve as a balancer. Since most BMS’ can’t handle our load requirements nor do they have low-temperature sensors, they’re pretty much worthless. The only thing a BMS can really do for us is to provide a balancer function. The system we’re building doesn’t really need a balancer, but it’s just a nice-to-have, if you have the inclination to put it in.
This balancer can be found on AliExpress for about $10. Follow the wiring diagram shown here exactly. You’ll need ring terminals for each point where the wires connect to the battery.

Inline Fuse & Holder
Optional
The image to the right is simplified shorthand for the part it is representing. This protects the positive control wire in the event of an accidental short. You can find a pair of these on Amazon for less than $10. You’ll need a ring terminal to connect one end of the wire to the positive on the battery, as shown in the diagram.

Butt Connector
A simple way to connect a couple of small wires together at this point in the diagram is to use a butt connector. One 18ga wire goes in, two come out. You can get a multi-pack of connectors in various sizes on Amazon if you don’t already have them.
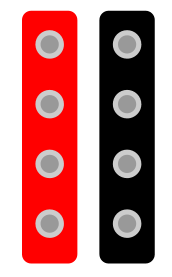
18 AWG Wire
This diagram uses two sizes of wire to keep things simple. 18 AWG (or 18ga, for short) and 2/0 AWG (or 00 AWG or 00ga).
I HIGHLY recommend pure-copper, stranded wire. Anything else isn’t up to spec.
I like using paired wiring because it makes the job of setting up most everything 12v a lot easier. You can buy 100′ of it on Amazon and use it for various stuff all over your rig. (Lights and USB ports are great with this wire.)
In the wiring diagram above, you’ll use mostly red wire, and a little black. Don’t worry that it comes pre-paired, it’s easy to strip apart for the couple feet you’ll need here.
2/0 AWG Wire
This is the heavy-duty wire in your system. It’s expensive, but it’s also important. Don’t skip out here!
You’ll need a few feet, somewhere between 5 and 10′ for most installations. Lots of options on Amazon to pick exactly what will fit your situation. Make sure to buy enough to go from the BusBars to your inverter as well. The Amazon package I’m linking to to also includes 10 terminals, which enough for this wiring diagram.

Battery Shut-off Switch
Thanks to the high-amperage relay (description is further down), the battery shut-off is a simple 12-v switch.
I personally like switches that don’t have LED lights on them. You can pick up this one on Amazon, it comes in a 5-pack. You’ll have switches available for other stuff like your water pump or other fun things.
To hook this up, you’ll need quick-disconnect terminals, which are also included in an electrical connection assortment kit from Amazon.
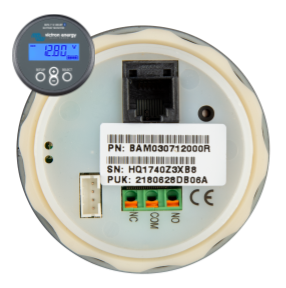
Victron BMV 712
This is the brains of the system. With this Victron unit, and the accompanying temperature connector (details further down), you can create your own BMS.
I’ll be creating a full blog posting soon covering how to hook up this component.
This component can be purchased at Continuous Resources or Amazon.
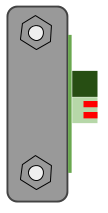
Relay
This is an electronic on/off switch. It’s controlled by the Victron and is the shield that protects your system. When the Victron detects something going awry, it’ll cut power to the signal cable and this relay will then disengage the large 2/0 wires you have connected and that will disconnect your batteries from whatever is causing the problem. This all happens in a fraction of a second.
You can pick up this relay on Amazon.

ANL Fuse Holder & Fuse
This is what’s known as a “Catastrophe Fuse”. In the event all else fails, this will protect the system.
Fuse sizing is important. What we’re building in this example is a 300-amp-hour system. This means we should limit, at most, to 300 amps of continuous power output for lithium batteries. Technically we could go higher for peak loads, but we’re applying the KISS method (Keep It Simple Silly!).
You can pick up this 300 amp ANL fuse and fuse-holder on Amazon.
Bus Bars
These items let you distribute power to multiple items. Instead of having a half dozen items all connected to the positive and negative battery terminals, these will clean up your installation and make tracing wires so much easier.
These bus bars are rated at 250 amps each. We’re using one for positive and one for negative.
Various options are available, here’s a pair on Amazon.
Shunt
This comes with your Victron BMV 712. It’s a 500-amp shunt.
The purpose of the shunt is to measure, with great accuracy, the power going into or out of the batteries. This along with the Victron’s “smarts” will let it determine the SOC (State of Charge) of your battery. With lithium batteries, this is particularly important since their discharge curve is so flat.
Connected to your shunt will be several cables. You can read more about those in the Victron blog posting here.

Emergency Bypass
This momentary switch will let you re-engage your batteries in the event the Victron has determined that the batteries should be shut off.
When might this happen? Low state of charge or low-voltage cutoff.
Let’s give an example: You’ve been running your batteries for days, and they’re getting low. So low, that the Victron has disabled them. Since your batteries are so low, you decide to plug into shore power, or maybe even clean your solar panels. So now you’re at a point where power could come into your system, but it’s not happening! That’s because the Victron shut off the batteries and isn’t going to open them back up until the batteries have some more juice. So it seems like we’re in a chicken-and-the-egg situation.
This momentary switch fixes that problem. If you know you’re in a good situation, power and temperature-wise, you can re-engage the batteries. This will reconnect the batteries to the rest of your system, and allow your charge (or solar charge controller) to do its job. After holding this for a couple of seconds, the Victron should sense that the batteries are happier, and re-engage the relay on its own. You can let go of the switch and let your batteries recharge.
You can pick up one of these momentary switches on Amazon.
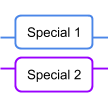
Special Victron Wires
Special 1 is a data cable that connects the shunt to the Victron. This cable comes with your Victron and does not need to be purchase separately.
Special 2 is a temperature-sensor wire that is specific to the Victron BMV. This lets the Victron sense the temperature of the battery and keep things in check. Simply connect it to the BMV and then connect to the positive terminal on the battery as shown in the diagram.
You can pick up Special 2 at Continuous Resources or Amazon.