A solar charge controller takes the power from your solar panels and uses it charge your batteries. There’s only a couple things to think about with solar charge controllers.
PWM or MPPT
There’s two major kinds of solar charge controllers: Pulse Width Modulation (PWM) or Maximum Power Point Tracker (MPPT). If you have a tiny system, say 100 watts or less and you’re charging a lead-acid battery, a cheap PWM is fine. For anything else, grab a MPPT.
Amps
Every charge controller can handle a certain amount of power. You’ll want to size your controller to fit your solar array reasonably closely. Going a little bigger will let you add some additional solar panels, if you find the room for them. Just about every controller will list the number of “Amps” (current) that they can handle. To find your approximate number of amps, take the total wattage of solar panels you’re planning on using and divide by 12 (for standard systems). If you have a 100-watt panel, you’ll want a controller that can handle at least 8.3 amps, or rounded-up, 10 amps.
Connectivity
Some controllers offer some fancy connection options including Bluetooth, WiFi, and hard-wired ethernet connection options. Victron leads the pack here with their line of “Smart” systems that all connect via Bluetooth. This feature seems somewhat frivolous, until it comes time to configure the charge parameters, then it’s a game changer.
Adjustable Charge Settings
Just about every controller has some kind of adjust for Battery Type and can support various kinds of batteries. If you’re running a typical lithium setup, this will probably be good enough for your needs. If you’re running a custom lithium pack, like a Tesla battery pack or any non-standard LiFeP04 or other chemistry pack, you’ll need the ability to change the charge settings to prevent damage to your battery. For these systems, you’ll need one of the more advanced charge controllers that let you specify exactly what voltages and how to charge your batteries.
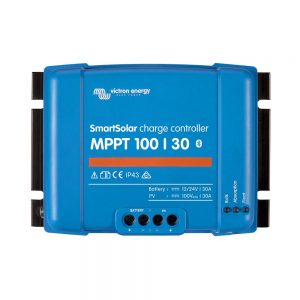
Victron SmartSolar
Style: MPPT
Amps: Various models available
Connectivity: Bluetooth
Display: Bluetooth -> Phone
Adjustable: Yes
Link: Amazon
The ability to connect to these units via Bluetooth to adjust charging parameters is (almost) priceless. This is an easy controller to recommend to anyone. Just pick the size that works for your installation, and you’re good to go.
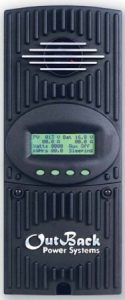
Outback
Style: MPPT
Amps: 60
Connectivity: None
Display: Unit Display
Adjustable: Yes
Link: Amazon, alteEstore
This is a solid controller, I can speak from experience. This is the controller I’ve had in my rig for over a year now. It’s handling 2,130 watts on my 48 volt bank wonderfully. It’s compatible with battery banks from 12 volt to 60 volts. With higher voltage batteries, it can push some serious power.
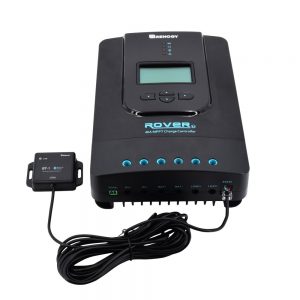
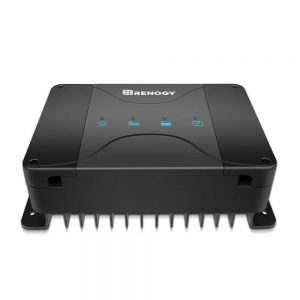
Renogy MPPT
Style: MPPT
Amps: Various models available
Connectivity: PC, Bluetooth (optional adapter)
Display: Unit Display, PC, Bluetooth -> Phone (optional)
Adjustable: Yes
Link: Amazon
Renogy offers all the features and functionality of the Victron units, but at lower price points.
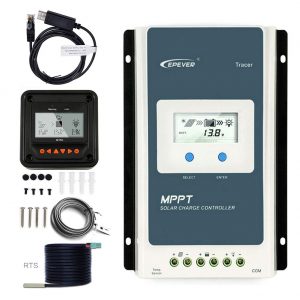
Temank
Style: MPPT
Amps: 40
Connectivity: PC
Display: Unit Display, Remote Screen
Adjustable: Yes
Link: Amazon
A less expensive but still highly rated unit.
Renogy MPPT with DC-DC
Style: MPPT
Amps: 50
Connectivity: None (yet)
Display: LED indicator lights
Adjustable: Presets only
Link: Amazon
This is an interesting unit if you have any class of motorhome, including vans. It has solar inputs plus a DC-DC input to connect to your engine’s alternator. It can charge from either source, which is really handy and convenient for motorhome users. It’ll even trickle charge the starter battery via solar after the house battery has been charged up.
Pros: DC-DC charger plus MPPT solar charge controller all in one device. Fully automatic.
Cons: A single device that if it fails, you’re out of luck. No external display, no internal display, only LED indicators. A separate battery monitoring system like the Victron is highly recommended.